Twitch Clips are a fantastic way to capture and share special moments, highlights and funny scenes from your favorite streams. Whether you're a streamer looking to capture your best moments or a viewer looking to share a funny scene, Clips offer the perfect feature to do so.
In this article, you will learn how to create clips on Twitch step by step and which functions you should use. We also explain how you can further share, manage and even download clips to get the maximum reach.
Step-by-step guide: How to create a Twitch clip
The creation of a Clips on Twitch is simple and requires just a few clicks. Here is the complete step-by-step guide:
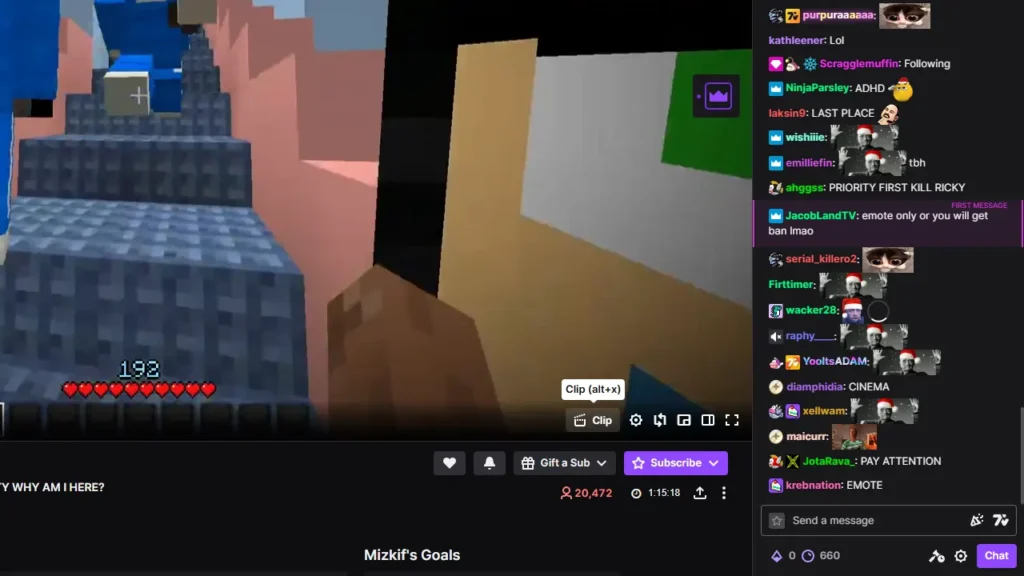
- Open the clip editor: To open the clip editor, click on the clip icon (movie clapperboard) in the bottom right-hand corner of the stream. Alternatively, you can also use the ALT + X key combination to create a clip directly.
Tip: On mobile devices, you will also find the clip icon in the control bar. You can also create a clip there with a simple click.

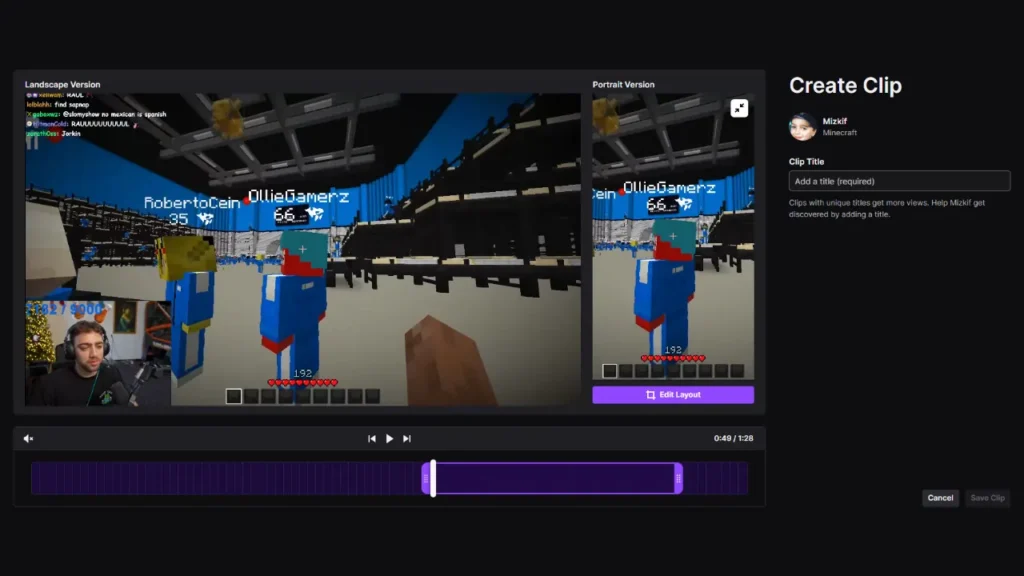
- Set clip: After opening the clip editor, you can adjust the start and end time of your clip using a slider. This way you can make sure that only the moments you want are included. Clips on Twitch are up to 60 seconds long by default, so it is important to select the highlights precisely.
- Customize layoutIf you plan to share the clip on platforms such as TikTok or YouTube Shorts, adjust the portrait format layout. This way, the clip fits perfectly into the format of these platforms and increases the chances that your clip will appeal to viewers there.
- Name the clip: Give your clip a suitable title that describes the scene. A meaningful title not only helps you to find the clip quickly, but also makes it more attractive to other viewers.

- Save clip: Once all settings are correct, click on "Publish". Your clip will then be saved and will be available directly on the streamer's Twitch channel.
Can anyone create Twitch clips?
Yes, basically every viewer who has a Twitch account and is logged in can create clips on Twitch. However, there are a few requirements:
- The streamer must have activated the creation of clips in its settings.
- Some streamers restrict the creation of clips to certain user groups, e.g. only followers or only subscribers.
- A viewer who has been blocked by the streamer cannot create clips on their channel.
Once the requirements are met, clip creation is easy for all viewers. Twitch has developed this function to promote interactivity and give viewers the opportunity to capture special moments.
Automatically share clips on TikTok and YouTube Shorts: How it works
It is particularly interesting for streamers to share clips on other platforms in order to increase their reach. Twitch offers direct sharing options for this:
- Share on TikTok and YouTube Shorts: Once you have created a clip, you will find the option to share it directly on TikTok or YouTube Shorts. TikTok and YouTube Shorts in particular offer a huge potential audience base, so your clips can often achieve a greater reach there.
- Sharing on other social media platforms: You can also share your clips on X (formerly Twitter), Facebook or Reddit. These platforms often offer special communities that are interested in certain Twitch clips.
Sharing clips on multiple platforms can increase visibility enormously and bring new viewers to your Twitch channel.
The Clip Manager: The administration center for clips
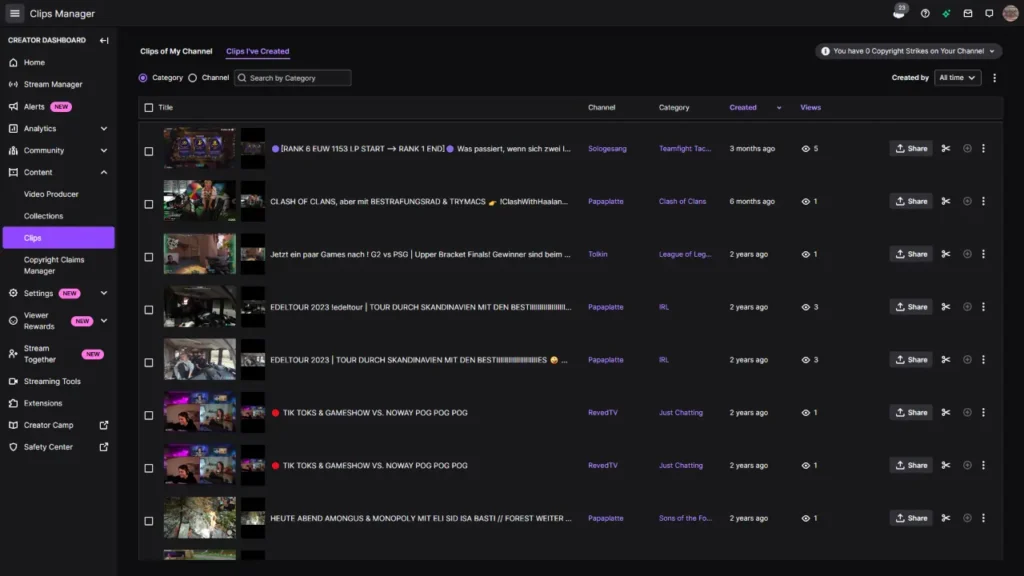
The Clip Manager on Twitch is a particularly helpful feature for streamers to keep control of all clips created on your channel. Streamers can use the Clip Manager to:
- Edit title and layout afterwards: If a clip needs to be adjusted afterwards, this is possible in the Clip Manager.
- View statistics: Streamers can view the creation date and the number of views for each clip. This helps to identify particularly successful clips.
- Share or download clips directly: Clips can be shared on social media with one click or downloaded for further editing.
- Delete clips: If a clip should no longer be available, it can be deleted in the Clip Manager.

The clip manager is accessible via the creator dashboard and provides a central overview of all clips created. This makes it easy for streamers to decide which clips should be used or removed.
Does the streamer see what viewers are clipping?
Yes, all clips created on a Twitch channel are public and can be viewed by the streamer and other users. This ensures transparency and allows streamers to discover the most popular and interesting moments captured by their viewers.
Streamers can use the clip manager to see which clips viewers particularly like. This gives them valuable feedback on which content is well received and what is generating enthusiasm among viewers.
How long are clips saved on Twitch?
Once created, clips remain on Twitch until they are actively deleted by the streamer. This means that clips remain saved "forever" unless the streamer decides otherwise.
This permanent storage is a particular advantage for special highlights and milestones in streaming, as viewers can access past clips at any time and relive the best moments.
Can I download Twitch clips?
Yes, Twitch clips can be downloaded in various ways. If you want to know exactly how this works, you can find detailed instructions with various methods in our article here: How to easily Download Twitch Clips: Ways to Download Clips for free
Downloading clips allows you to share them again on other platforms, edit them into highlight videos or keep them as a reminder of special moments.

